The hotend, fans and extruder are off this Creality Ender 5. What’s left is a good XYZ motion platform. A printed carriage block bolts onto the stock X carriage plate and gives it a standard mount: three M4 heat-set inserts. The first tool on that mount is a cheap rubber-band pencil holder, which turns the printer into a drawing machine.
The 3D model
This is the pencil holder on the carriage block. Drag to orbit, scroll to zoom, and use the Explode slider to pull the parts apart. The carriage block has its own viewer.
What it is
The Ender 5 is a cube-frame printer: the bed moves in Z, and the print head rides on an X gantry that moves in Y. Take the print head off and the X carriage is a sheet-metal plate on three V-wheels, with four threaded M3 points that used to hold the hotend. This project turns those four points into a general mount for tools.
Each tool is a small printed part that bolts to the carriage block’s M4 inserts. The block stays on the machine, so changing tools is three screws. The first tool is for drawing. Later tools, such as a camera for scanning, will mount the same way.
The carriage block
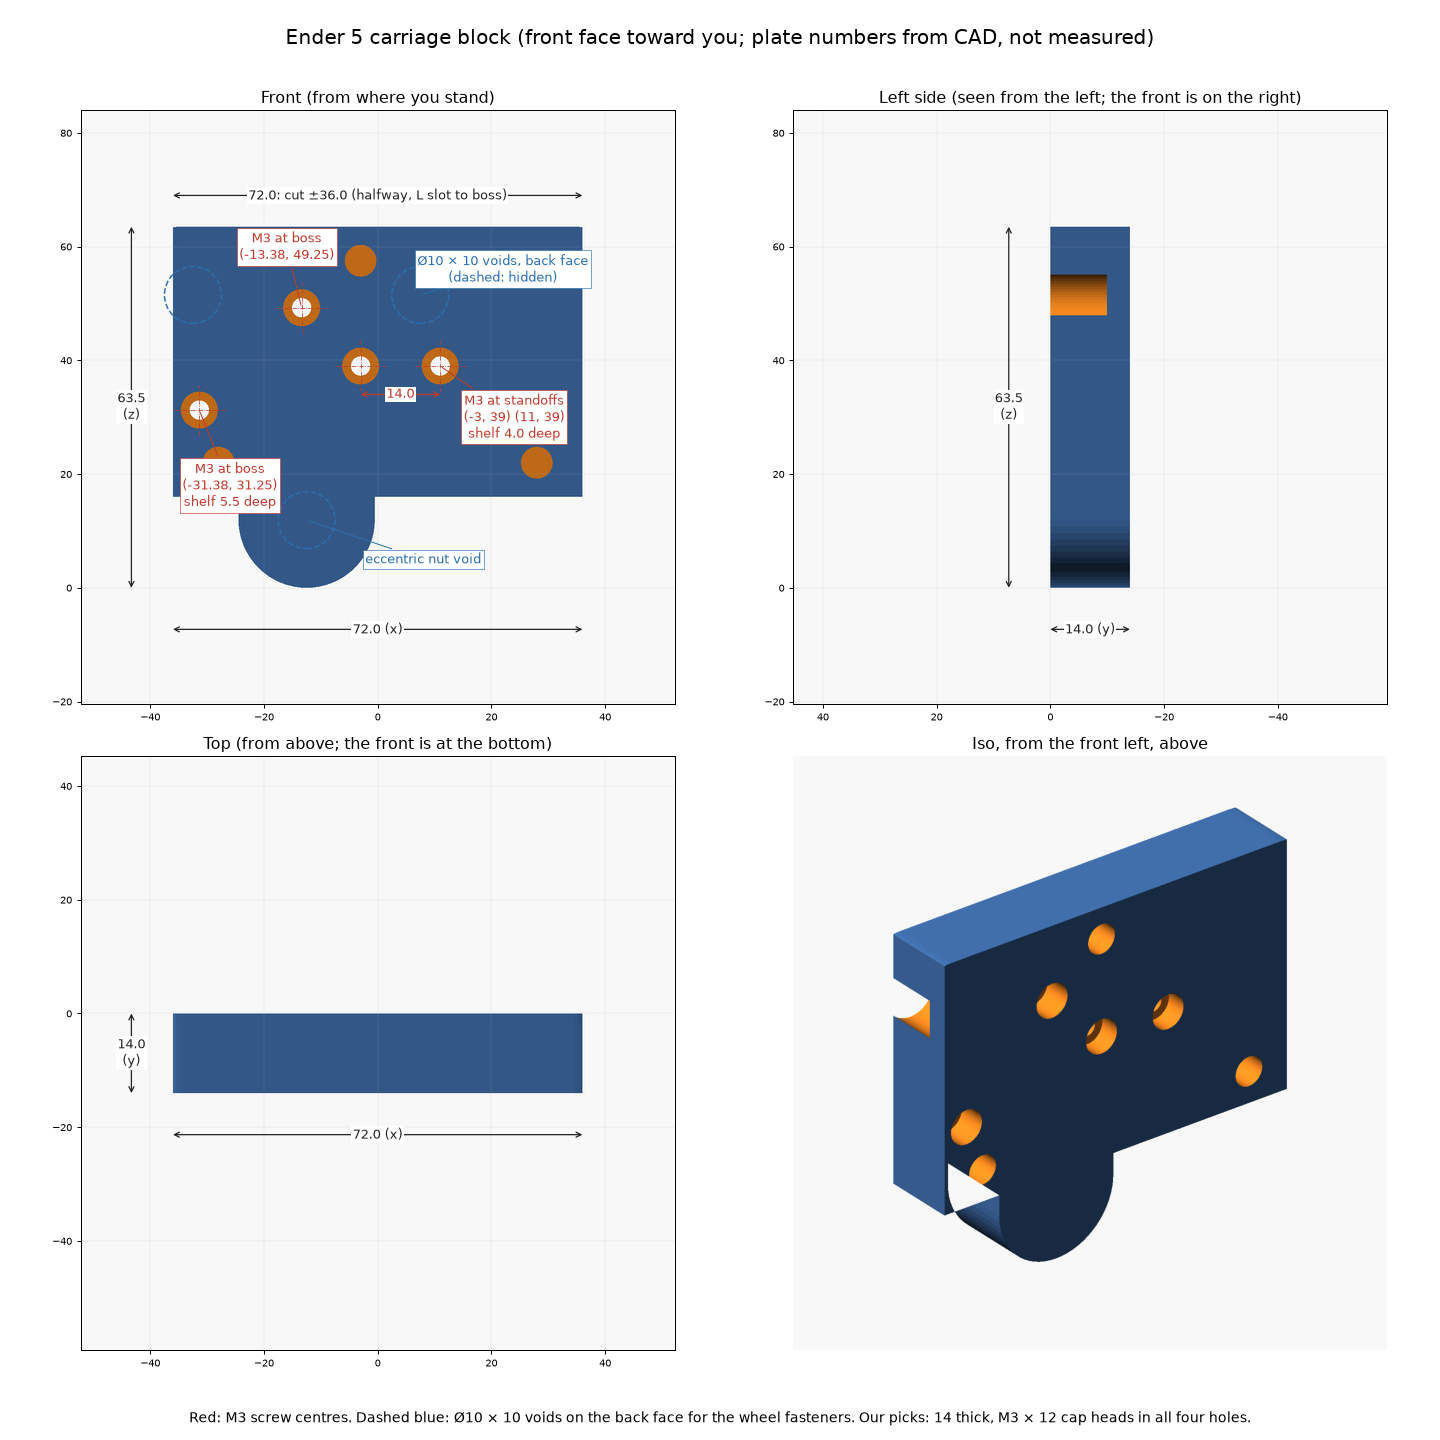
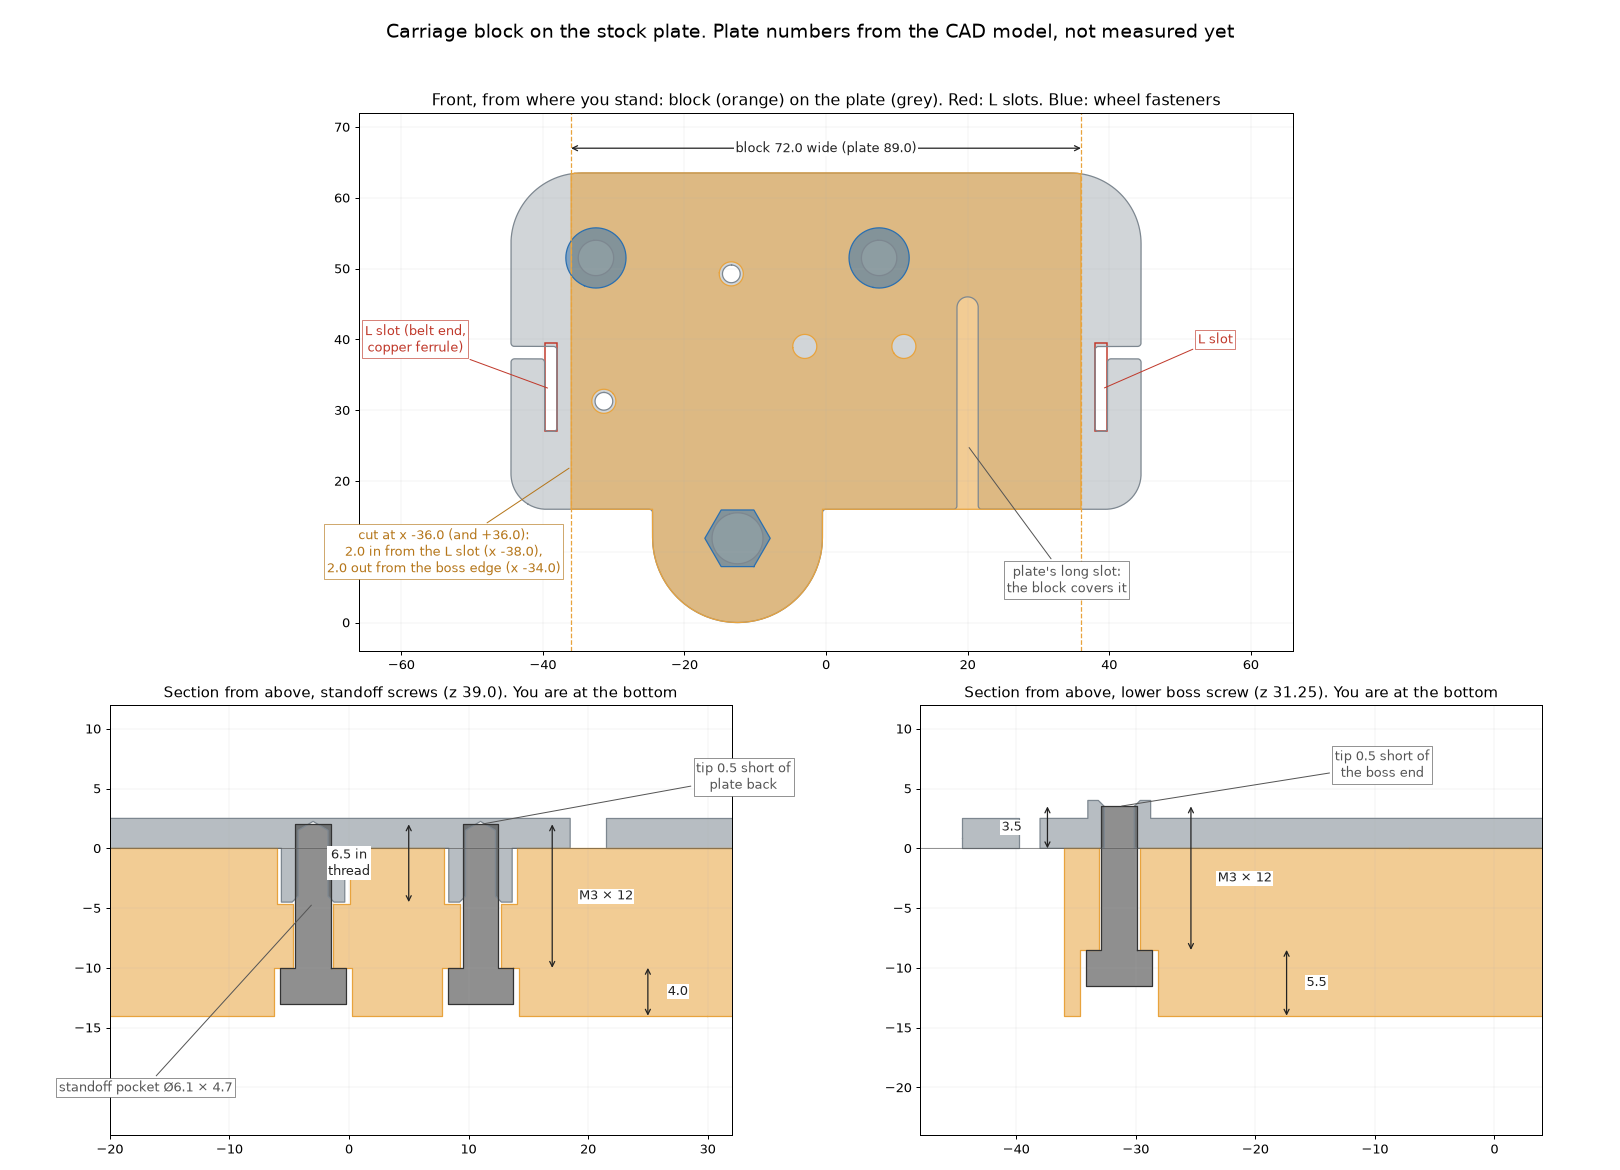
The block is 72 × 63.5 × 14 mm and covers the stock X carriage plate. It is held by all four M3 points: two standoffs on the front, and two threaded holes with bosses behind. The M3 × 12 cap heads sit on shelves inside the block, so the screws can stay short and nothing pokes out behind the plate.
- It is cut back to x = ±36 mm, so the belt ends and their ferrules come up through the plate’s L-shaped slots.
- A Ø10 × 10 mm pocket sits over each wheel fastener: the two top M5 cap heads and the eccentric’s nut.
- Three M4 heat-set inserts in the front face take the tools.
It prints front face down, with no supports, in about 20 g of plastic. The first one came off the printer on November 9, 2026.
The pencil holder
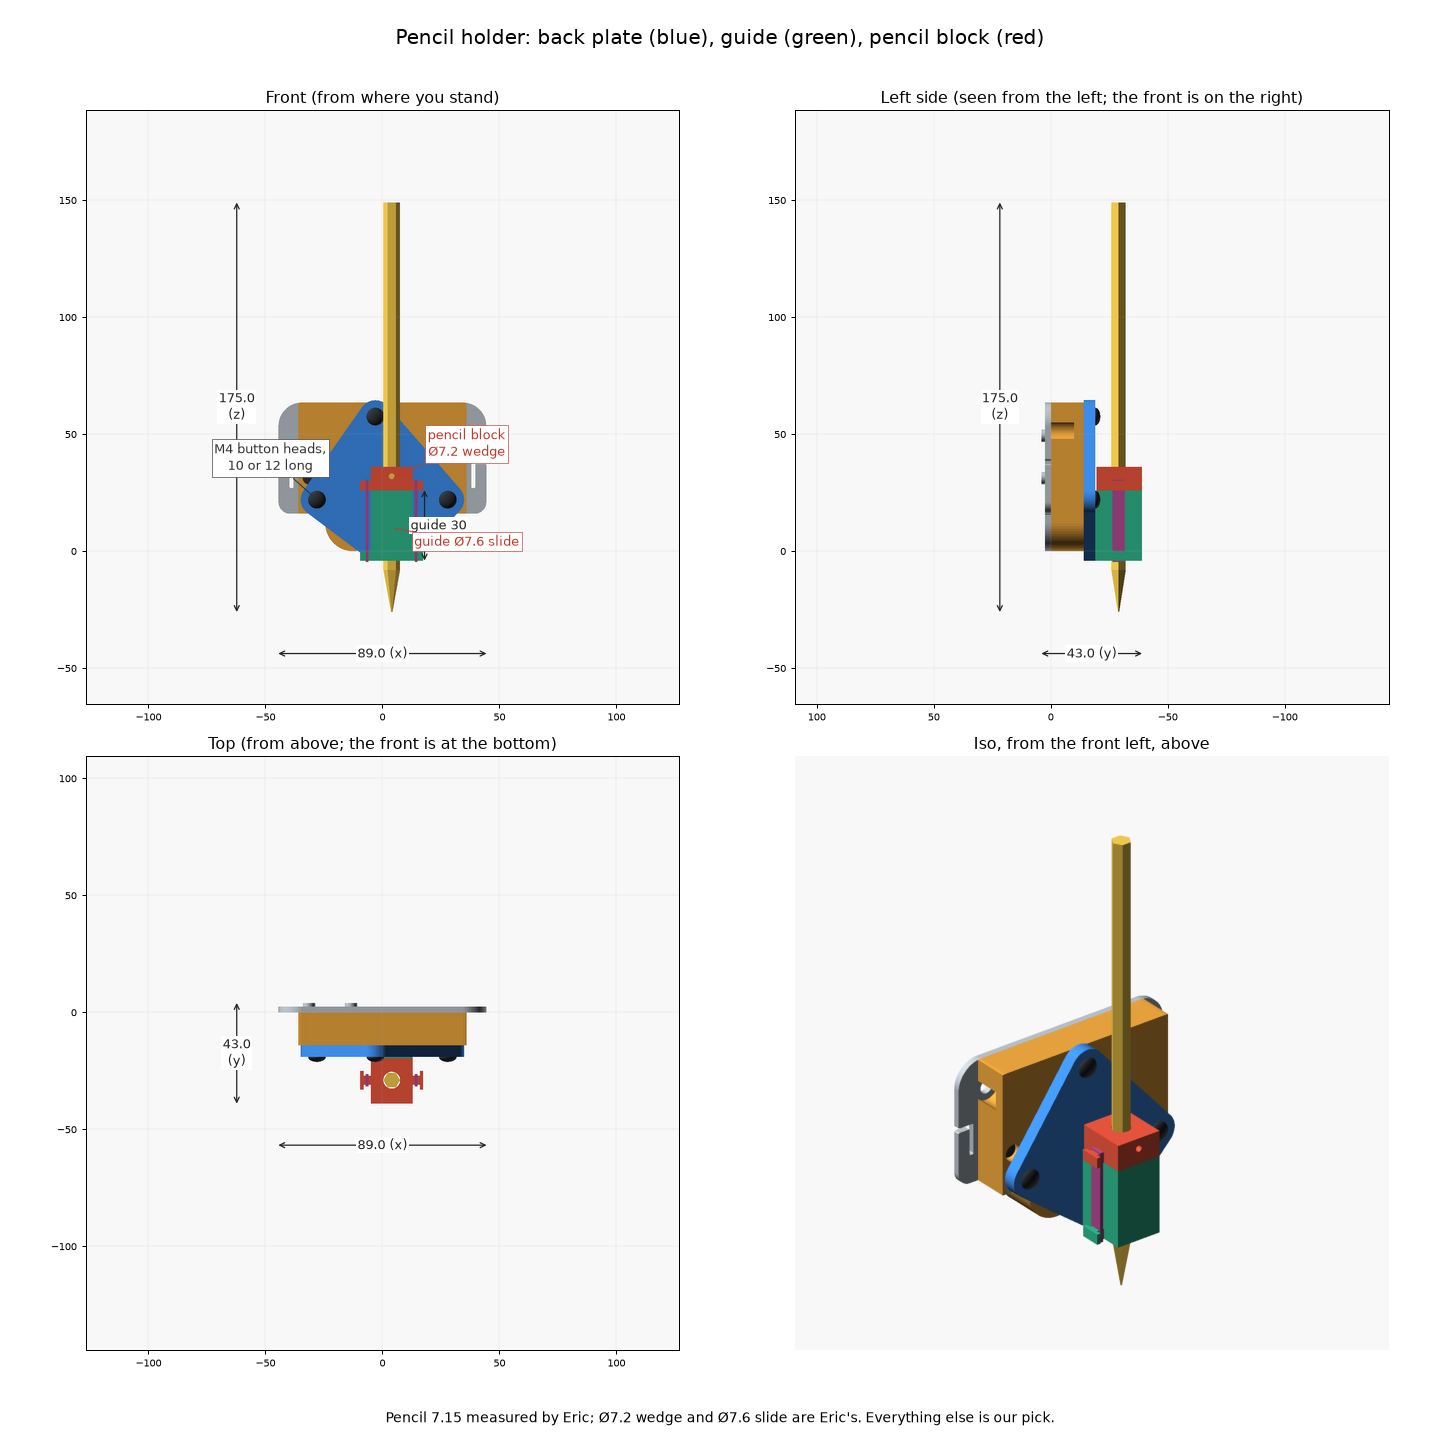
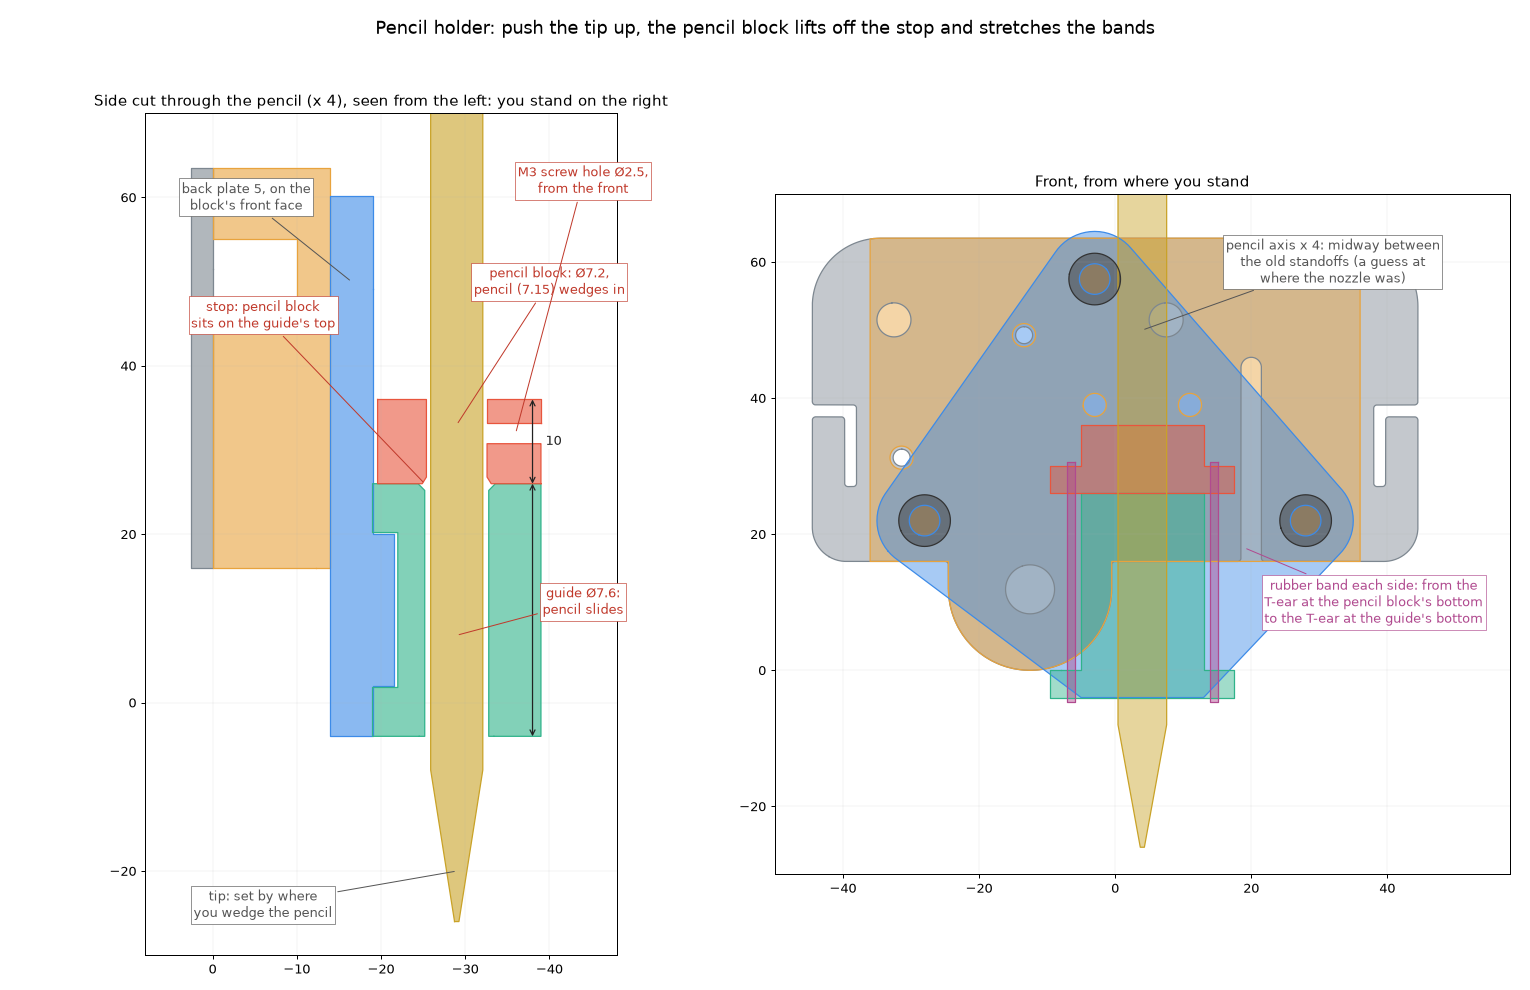
Cheap and cheerful. The pencil wedges into the pencil block through a Ø7.2 mm bore (the pencil is 7.15), and slides in a 30 mm long Ø7.6 mm guide below it. The pencil block rests on top of the guide, so the pencil can’t drop too far. A rubber band on each side, between the pencil block’s ears and the guide’s ears, pulls the pencil back down. When the tip touches the paper it rides up against the bands, so the pressure stays gentle even if the bed isn’t perfectly level.
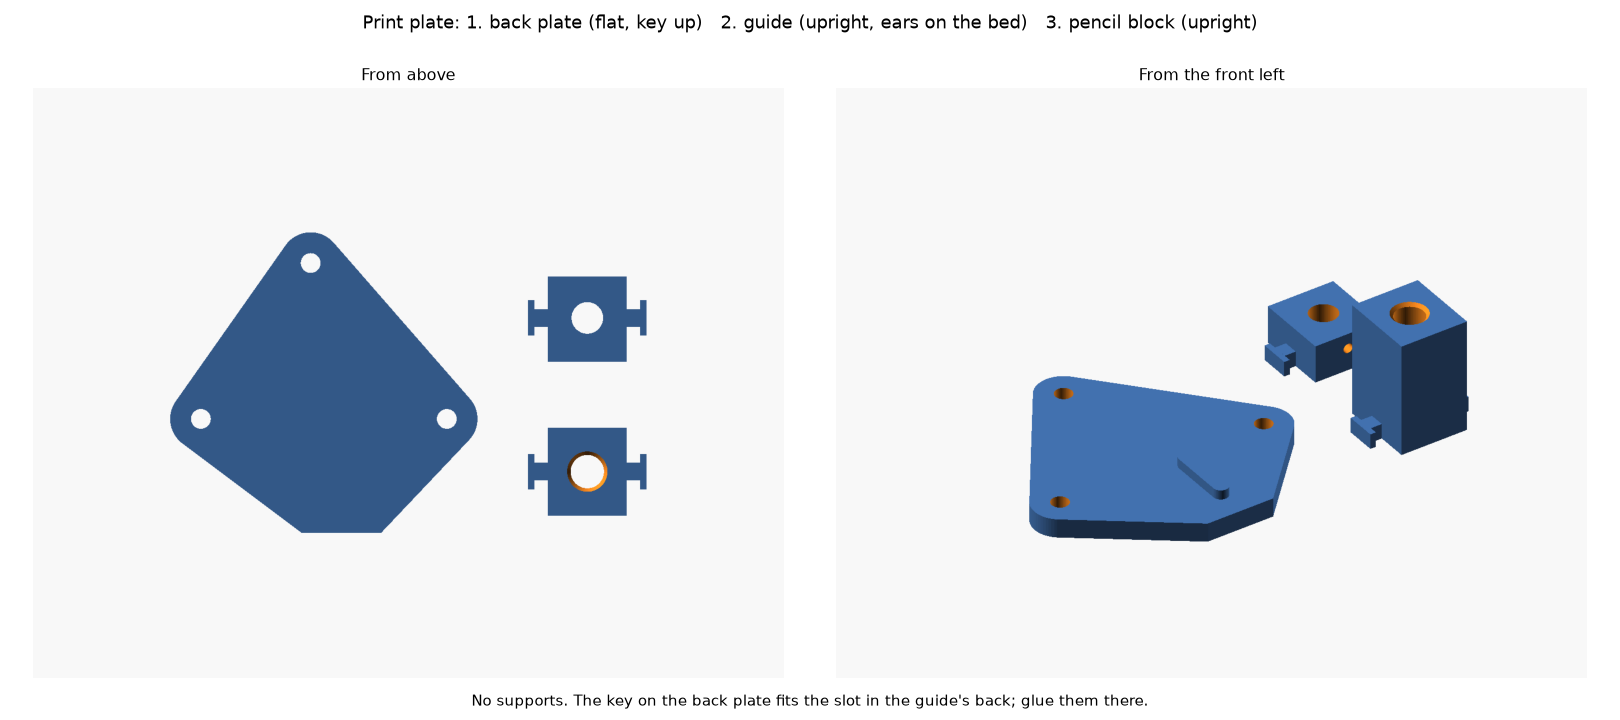
- The guide glues to the back plate. A raised key on the back plate fits a slot in the guide to line them up.
- An M3 screw hole in the front of the pencil block can pinch the pencil if the wedge fit is loose.
- The back plate bolts to the carriage block with three M4 button heads, 10 or 12 mm long.
- The ears are T-shaped posts at the bottom of each part, so they print flat on the bed.
The three parts print on one plate with no supports, in about 16 g of plastic: the back plate lies flat, and the guide and pencil block stand upright.
Status
| Date | What |
|---|---|
| 2026-11-09 | Hotend, fans and extruder removed. A CAD model of the stock X carriage plate found and checked against the machine. |
| 2026-11-09 | Carriage block designed and printed (blue PLA). Pencil holder designed in three parts and printed (green PLA). |
| Next | Fit the block, melt in the inserts, and try a first drawing. Klipper will run on a networked Raspberry Pi. |
How it was made
The parts are parametric OpenSCAD models. One build script makes the print STLs, the dimensioned drawings and the 3D viewers on this page.
The stock carriage plate model comes from “Ender 5 Pro PhaetusRapido2+ Orbiter 2.5 carriage conversion” by Kotlin on Printables (CC BY 4.0). Its plate dimensions haven’t been measured on the machine yet.